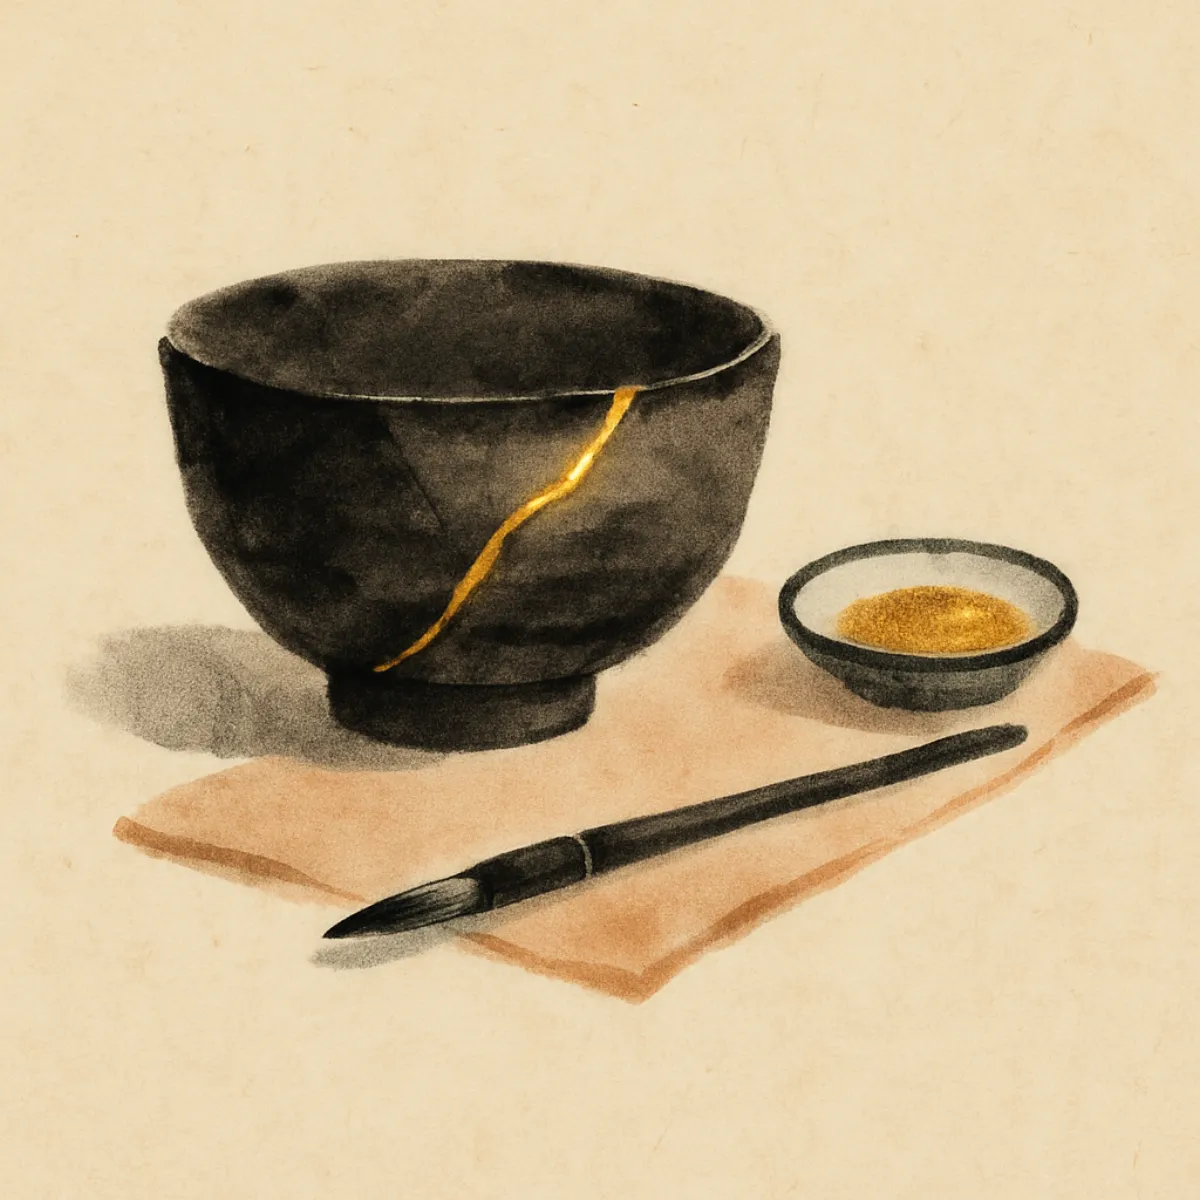
You broke something you loved — a tea bowl, a favorite mug — and instead of binning it you searched "how to do kintsugi at home." Now you're staring at kits that run from about fifteen dollars to over a hundred, all using the same word, and you can't tell what the price gap buys or whether you can drink from the result.
Here is the thing almost no listing tells you plainly: two completely different products are sold as "kintsugi." One mends the break with real lacquer and finishes it in real gold — it's food-safe and takes a month. The other glues the break with resin and dusts it with gold-colored powder — it sets in a day and belongs on a shelf, not a dinner table. Get that distinction right and everything else follows.
The two kits, side by side
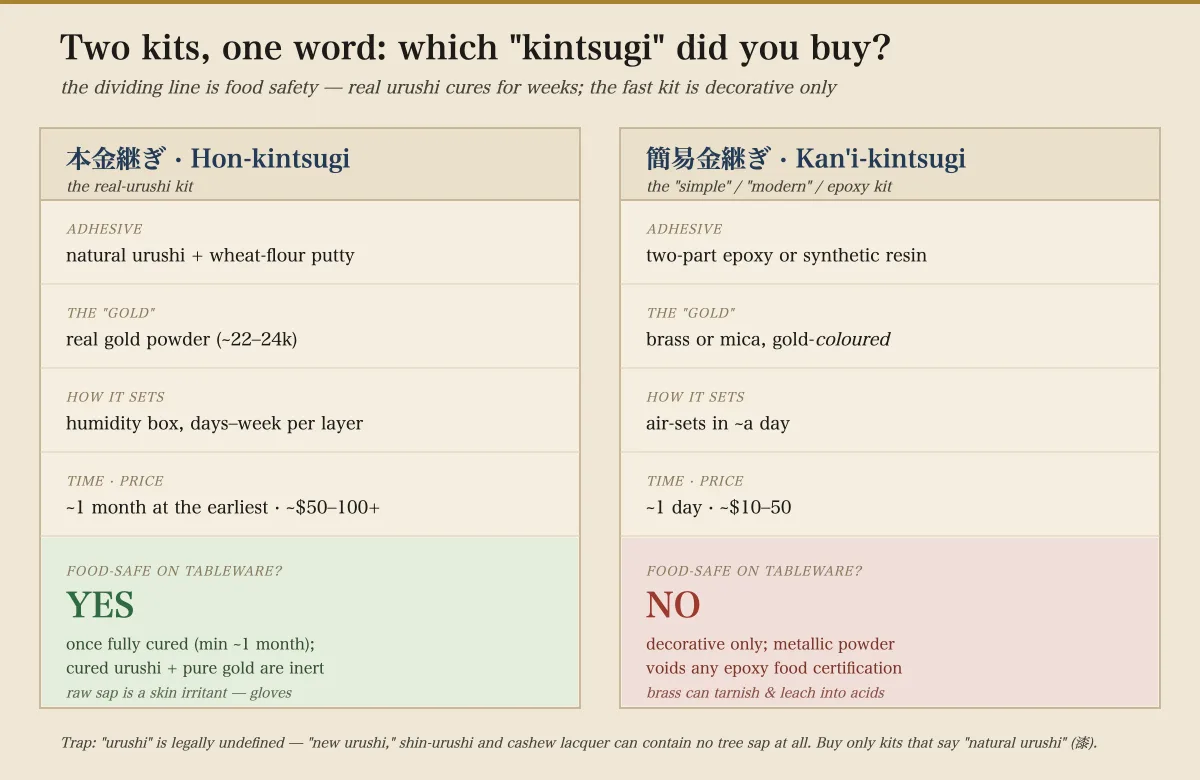
The real name for the first column is hon-kintsugi (本金継ぎ, "true kintsugi"): natural urushi tree sap does the bonding, real gold does the finishing. The second is kan'i-kintsugi (簡易金継ぎ, "simplified"), also sold as "modern" or "simple" kintsugi. The dividing line that matters most is food safety. Fully cured natural urushi topped with pure gold or silver is inert and safe — it's how tea bowls have been mended and used for hundreds of years. Epoxy plus metallic pigment is not: as one kit maker puts it, even if the epoxy carries its own food-contact certification, "that certification is voided the moment any additional powder is mixed in." Brass, bronze, and mica can oxidize, darken, and leach into acidic food.
The word "urushi" is a trap
You'd think "urushi" on the label guarantees the real thing. It doesn't. The word has no legal definition, so anyone can print it. Products called "new urushi" / shin-urushi (新うるし) or cashew lacquer (カシュー) are synthetic or semi-synthetic and often contain no lacquer-tree sap at all — and they're not appropriate for food vessels. Japan actually tightened food-contact rules here: a Positive List System for synthetic resins came into force on June 1, 2025, requiring pre-approved substances for anything touching food, and kintsugi sellers report cashew-type lacquers don't clear it for tableware. So don't buy on the word "urushi" alone. Look for "natural urushi" or the character 漆. And check the powder: real gold is priced like gold — one guide notes real gold powder "costs at least $50 for just 0.3 g," so a whole "gold" kit for fifteen dollars is not using any.
How a real repair actually goes
If you choose the urushi route, here's the honest shape of it. The hands-on time is only a few hours — but they're spread across a month or more, because urushi cures by humidity, not by drying (the chemistry is in the lacquer itself: an enzyme oxidizes urushiol in damp air). Each layer has to sit in a humidity box before the next. "Dry air is the enemy of urushi."
There are four stages:
- Bond. Knead a little wheat flour and water into a paste, blend in raw ki-urushi to make mugi-urushi, coat the broken edges thinly, press the pieces together, and hold with tape. Into the box it goes — mugi-urushi takes roughly a week to harden.
- Fill. For missing chips, kokuso-urushi (urushi + fine wood powder) rebuilds the gap; for shallow dips and smoothing, sabi-urushi (urushi + tonoko clay powder). Cure, then sand smooth.
- Build and line. Thin base coats of urushi, each fully cured and sanded, then draw the repair line in bengara-urushi, an iron-oxide red that makes the gold read warmer.
- Gold. When the bengara is semi-tacky — neither wet nor fully dry — sprinkle pure gold powder along the seam so it fixes to the lacquer, brush away the excess, then seal and gently burnish. This dusting technique is maki-e, the same one used to decorate lacquerware.
A clean crack with a few large fragments is the easy case. A missing chip or a shatter into many shards means extra fill-and-cure cycles, which is where two-to-three months (occasionally up to a year) come from.
The humidity box, and the rash
You don't need a workshop. A muro — the humidity box — can be any lidded box (cardboard, wood, plastic) with a damp cloth inside to raise humidity toward 70–85% at around 20–25 °C; rest the piece in it after every coat. The rest of the toolkit is household stuff: flour, canola oil, a utility knife, gloves, ethanol for cleanup.
The one non-negotiable is skin safety. Raw urushi contains urushiol, the same compound as poison ivy, and contact with uncured lacquer can cause an allergic rash called kabure. Wear rubber gloves and long sleeves, keep it off your skin, and if it does touch you, lift it with vegetable oil before it hardens, then wash. Sensitivity varies and not everyone reacts — but treat the precaution as mandatory. Once the piece is fully cured, the urushiol is locked in and it's completely safe to eat and drink from.
So which kit?
It comes down to one question: what is the piece for?
- You want to use it — eat or drink from it — buy a real natural-urushi kit and accept the month. It's the only path to a food-safe, durable seam, and cured urushi arguably gets tougher with age while instant adhesives grow brittle and can re-break.
- You just want to display it, or learn the motion cheaply — a simple/epoxy kit (~$10–50, done in a day) is a perfectly fine first try. Just never eat or drink from what you fix with it.
If you came here from what kintsugi actually is — that the gold is the finish, not the glue — this is the doing of it. And the flip side of repair is the everyday care that keeps a bowl from breaking in the first place. Kintsugi is what you reach for when that care runs out — slowly, in a damp box, one cured layer at a time.